> ## Documentation Index
> Fetch the complete documentation index at: https://specterops-bp-2731-onprem-architecture.mintlify.site/llms.txt
> Use this file to discover all available pages before exploring further.
# SAML: ADFS Configuration
> This document provides instructions for creating an application within ADFS for compatibility with BloodHound Enterprise.
export const IDPIntro = ({auth_mode}) => {
const mode = (auth_mode || '').toUpperCase();
const isOIDC = mode === 'OIDC';
const href = isOIDC ? '/manage-bloodhound/auth/oidc' : '/manage-bloodhound/auth/saml';
const label = isOIDC ? 'OIDC' : 'SAML';
return
See {label} in BloodHound for order of operations, general {label} setup, and user configuration in BloodHound.
;
};
 ## Create an Application
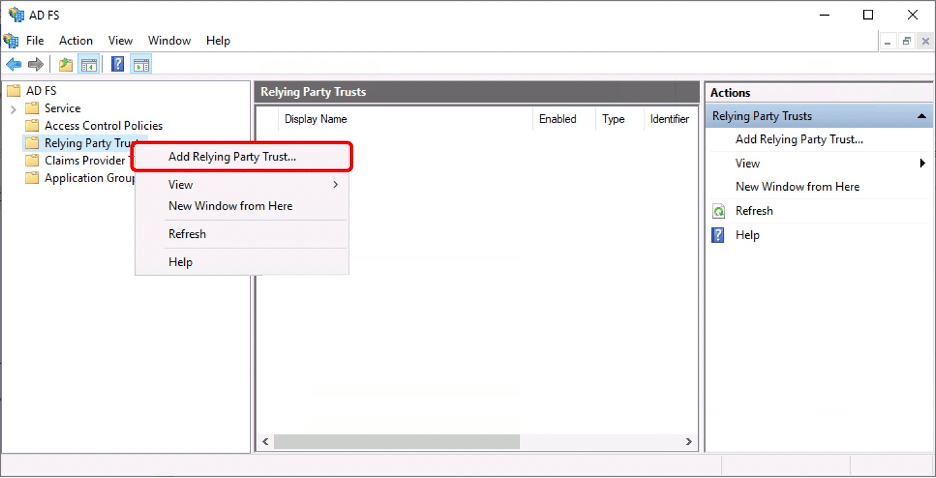
1. In the AD FS management console, right-click on Relaying Party Trust and click “Add Relaying Party Trust”.
## Create an Application
1. In the AD FS management console, right-click on Relaying Party Trust and click “Add Relaying Party Trust”.
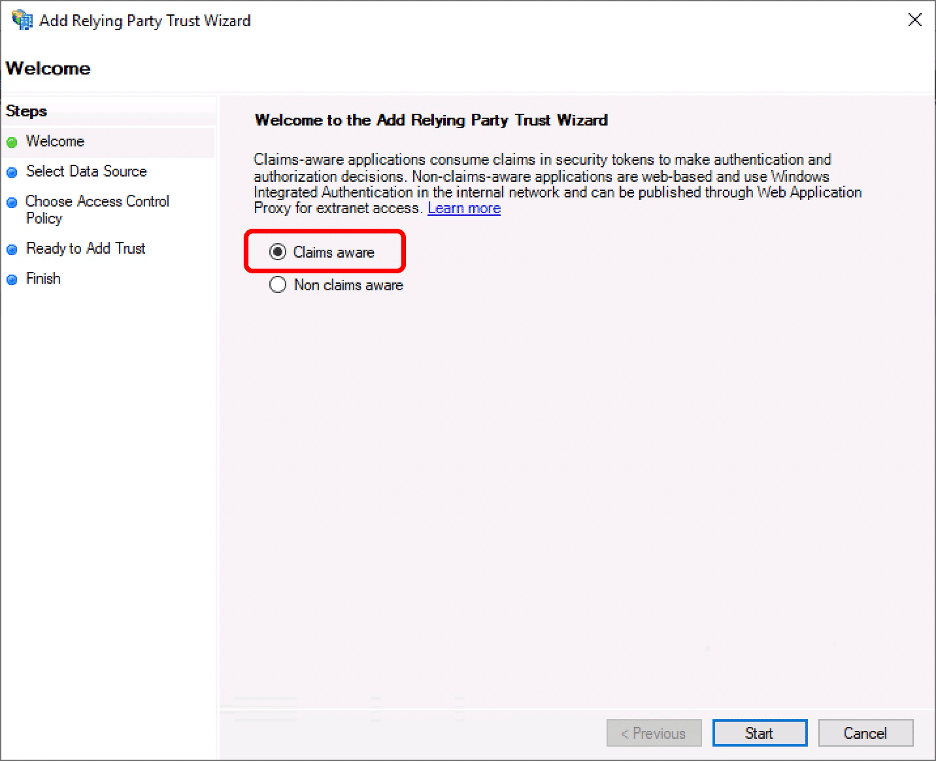
 2. Choose “Claims aware” and click “Start”.
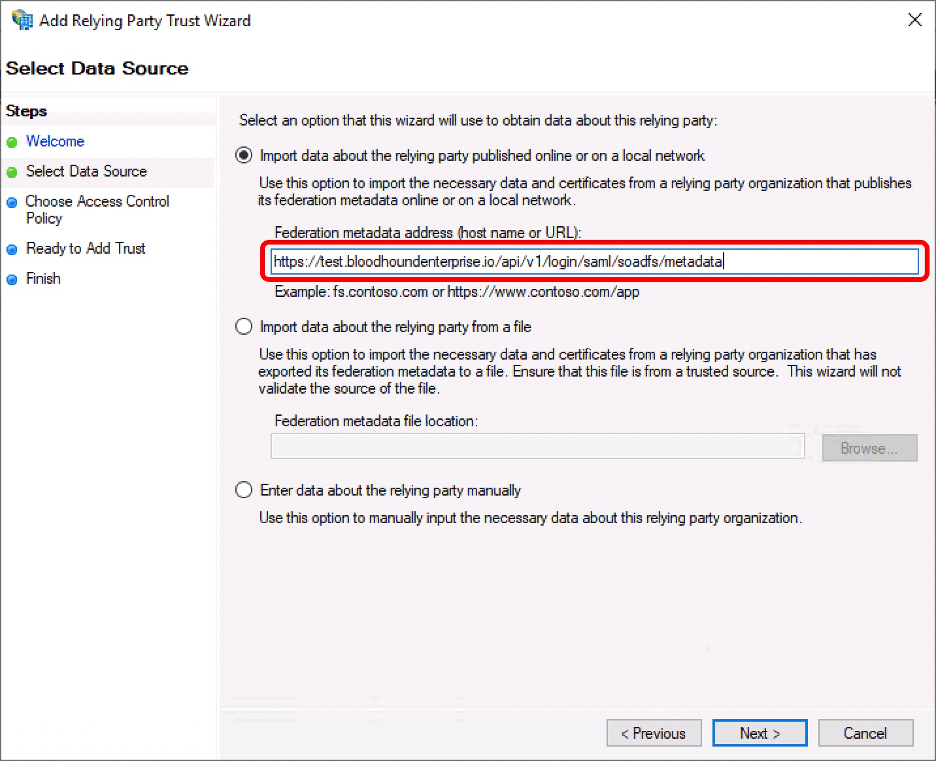
 3. Insert the metadata URL based on your chosen name and click “Next.”
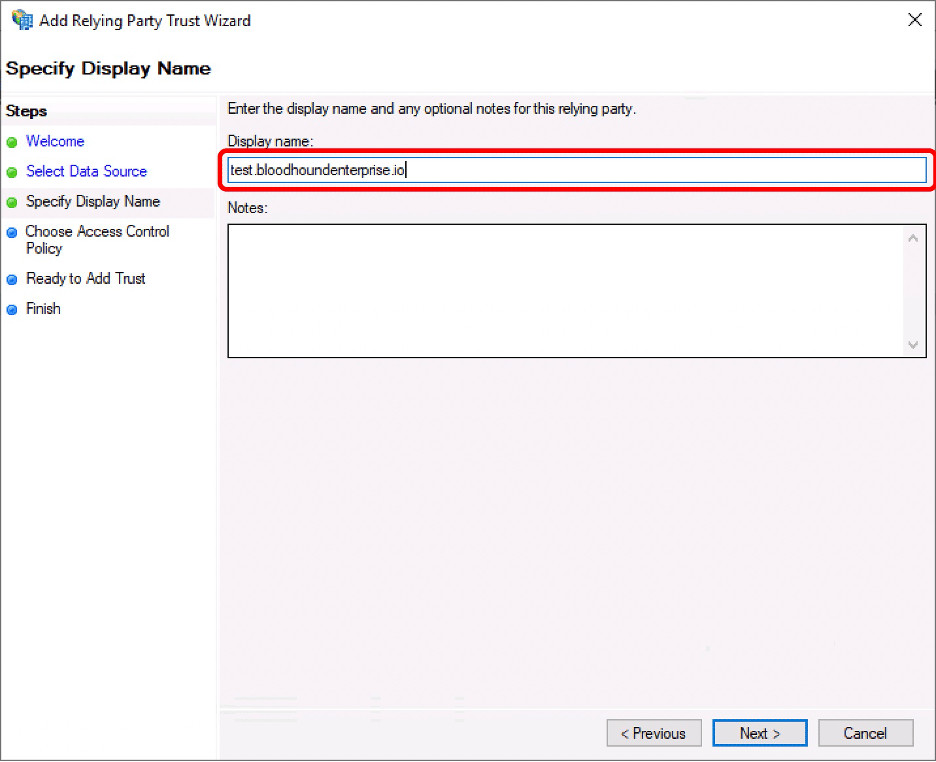
 4. Enter the preferred display name and click “Next.”
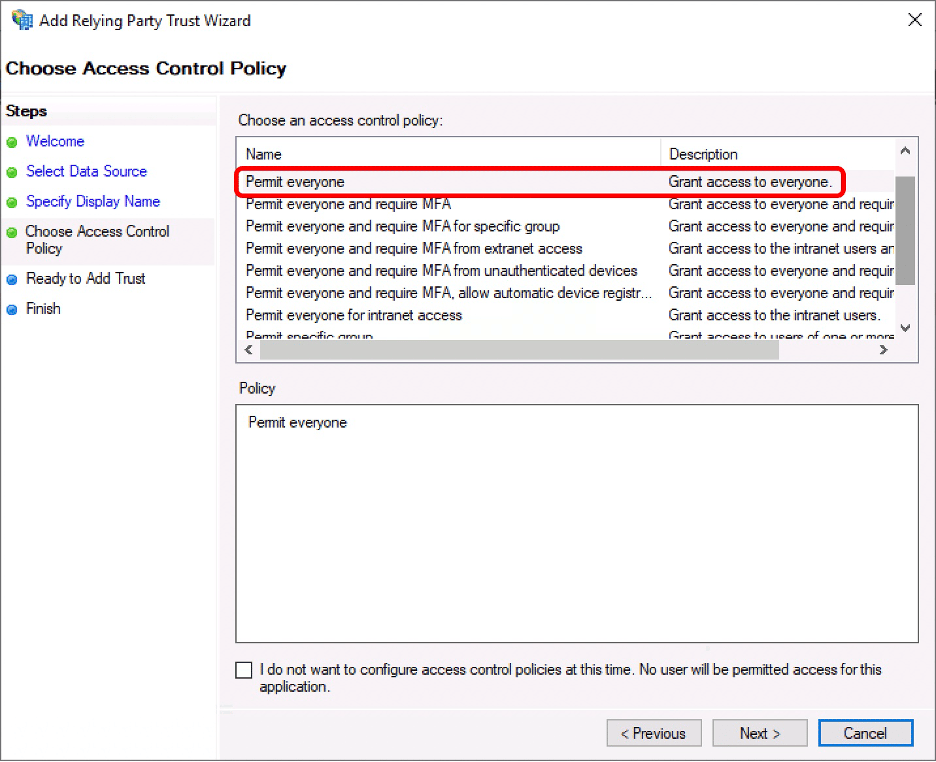
 5. Choose the desired Access Control Policy. (Note that access and permissions are configured within BloodHound Enterprise).
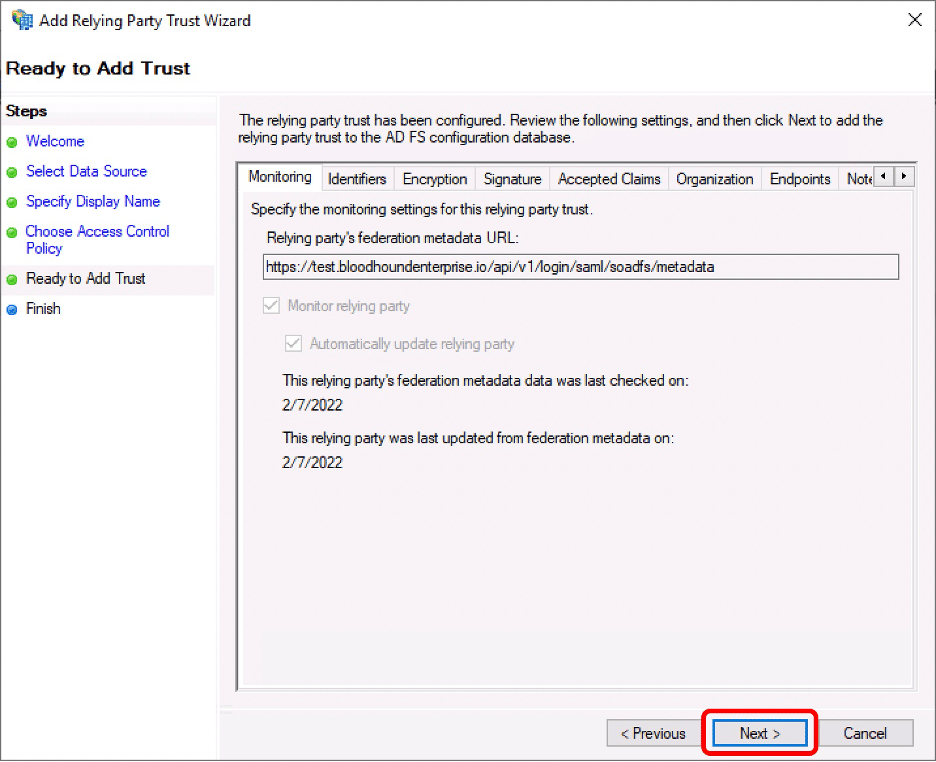
 6. Review the information presented and click “Next”.
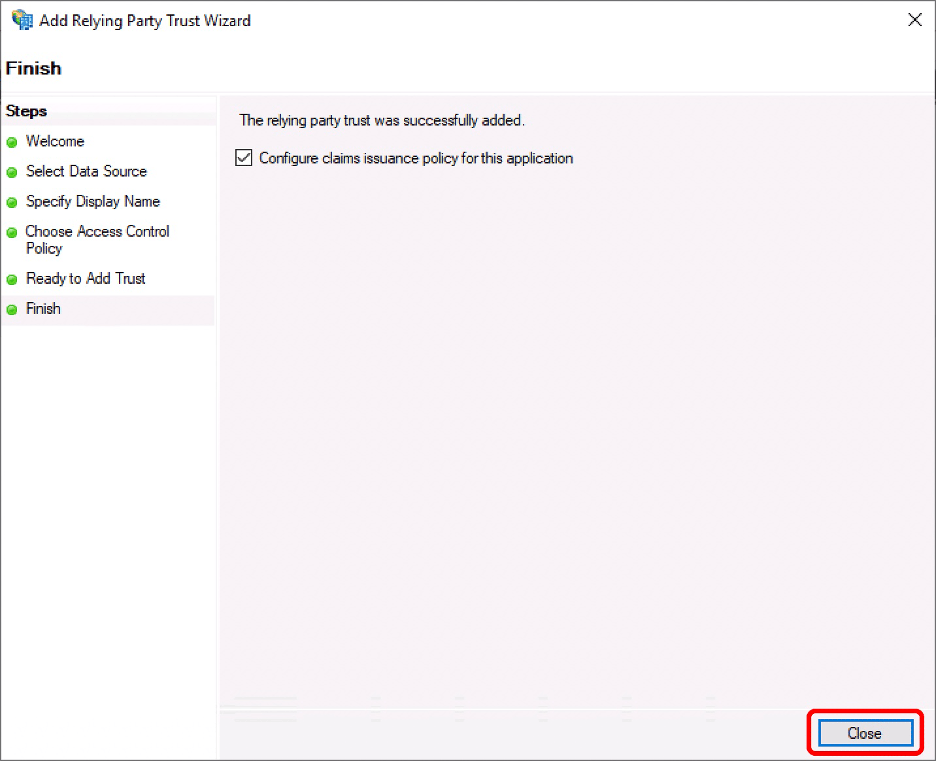
 7. Leave the “Configure claims issuance policy for this application” box checked and click “Close”.
 ## Complete SAML Integration Configuration
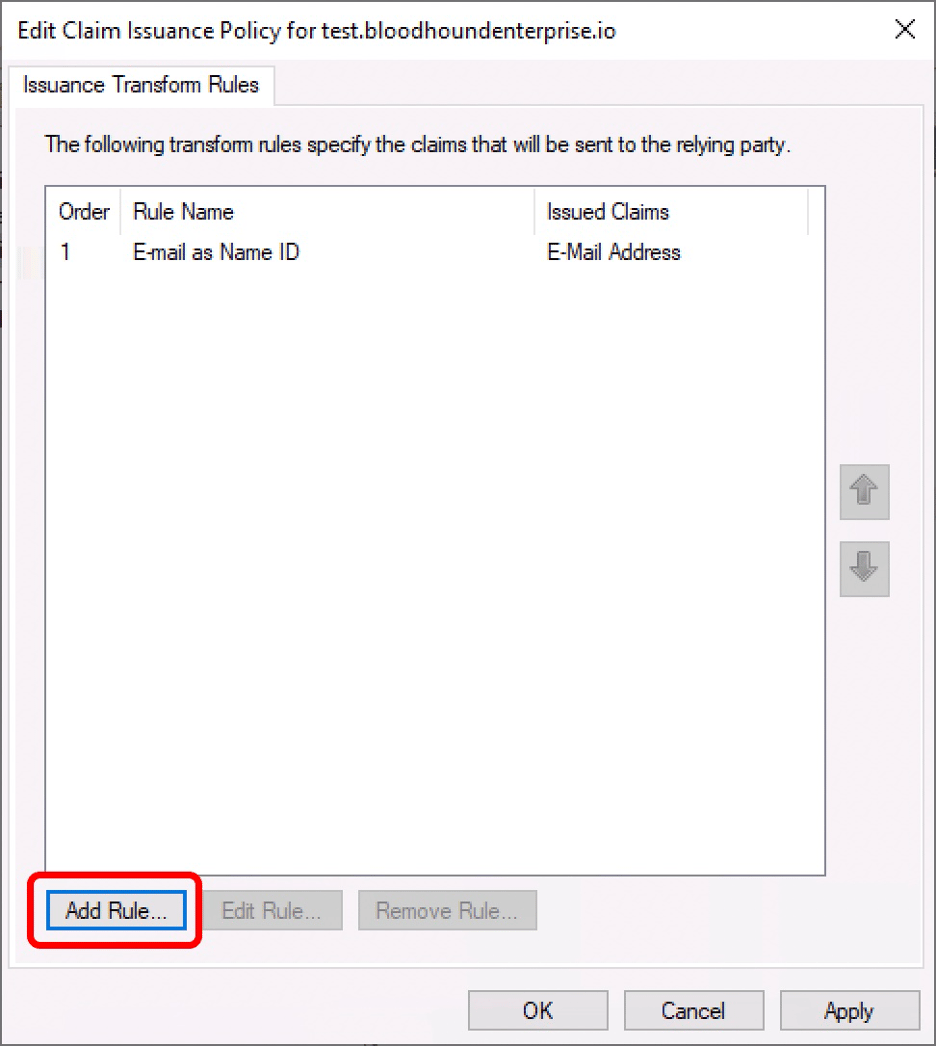
1. On the “Edit Claim Issuance Policy” dialog box, click “Add Rule…”.
## Complete SAML Integration Configuration
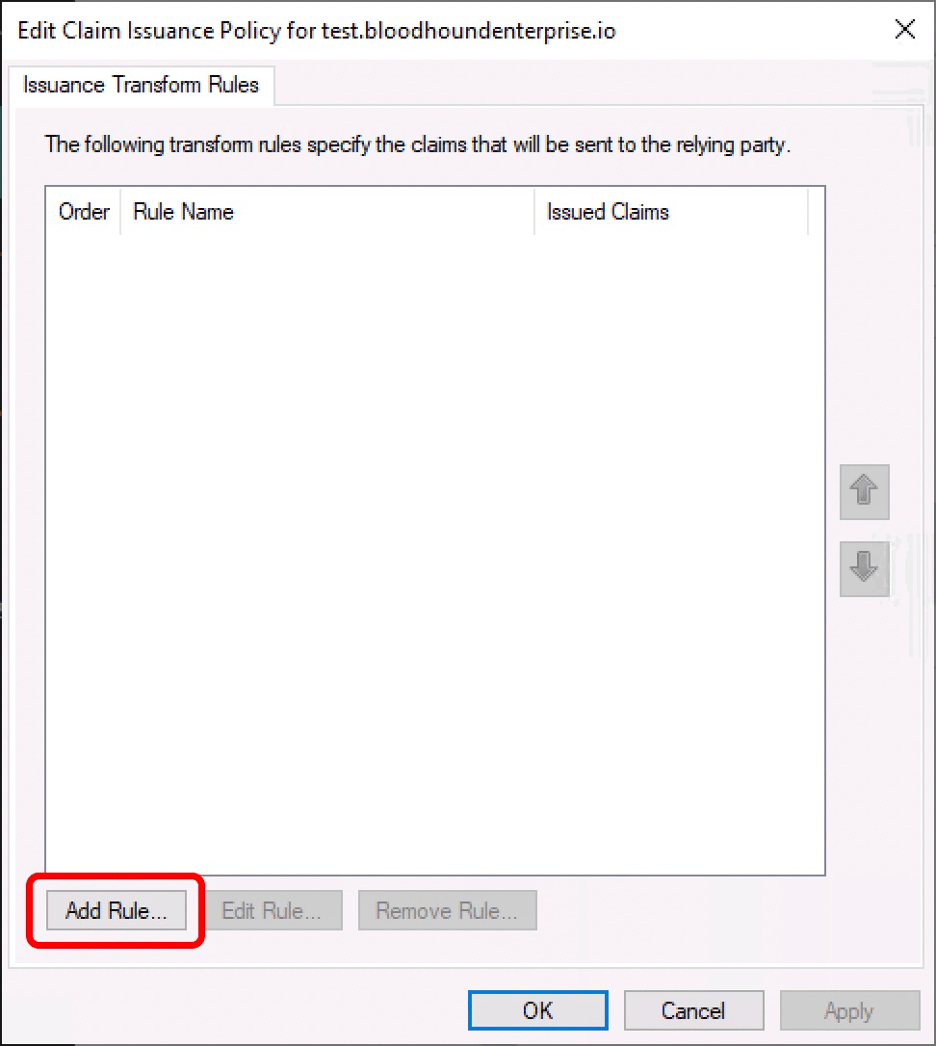
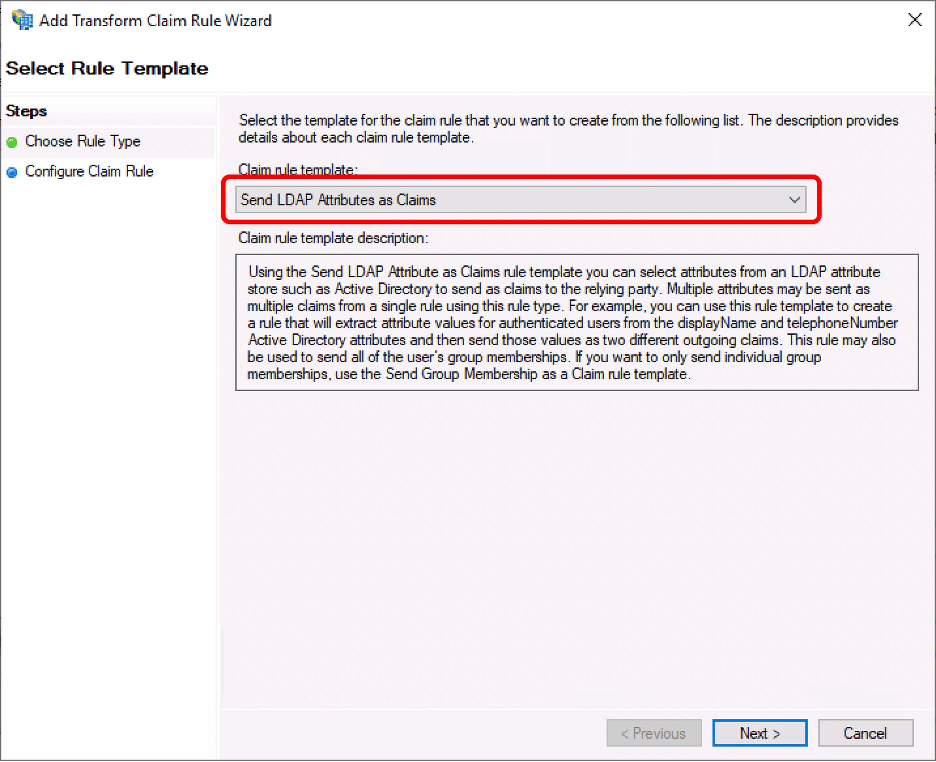
1. On the “Edit Claim Issuance Policy” dialog box, click “Add Rule…”.
 2. Choose “Send LDAP Attributes as Claims” and click “Next.
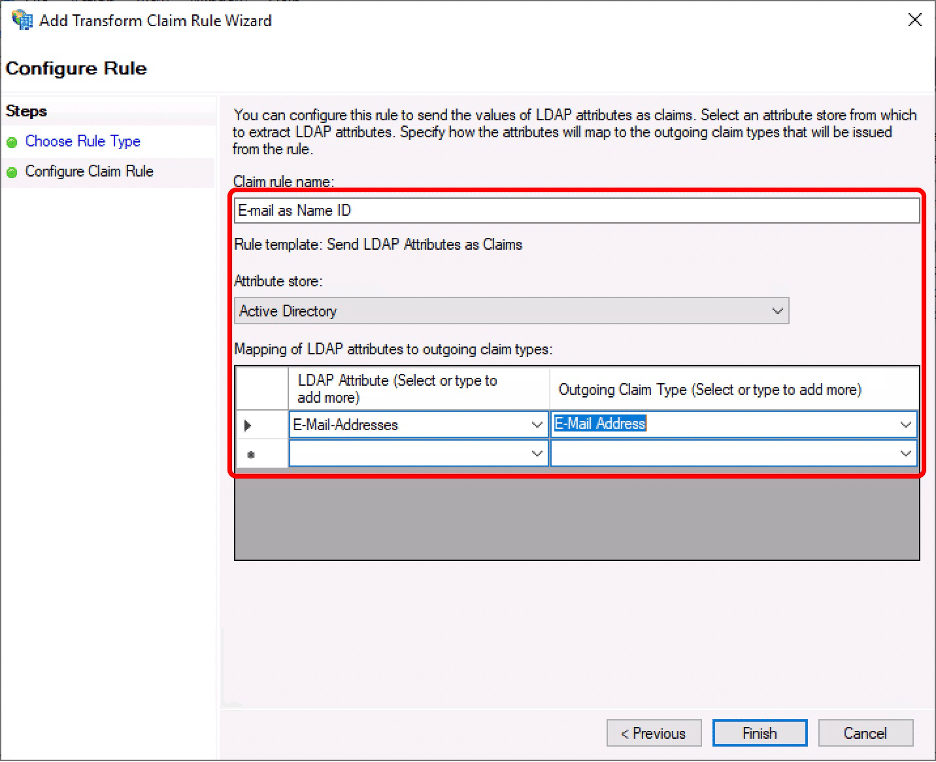
 3. Fill out the following and click “Finish”.
LDAP Attribute: E-Mail-Addresses
Outgoing Claim Type : E-Mail Address
3. Fill out the following and click “Finish”.
LDAP Attribute: E-Mail-Addresses
Outgoing Claim Type : E-Mail Address
 4. Click “Add Rule” to add another claim rule.
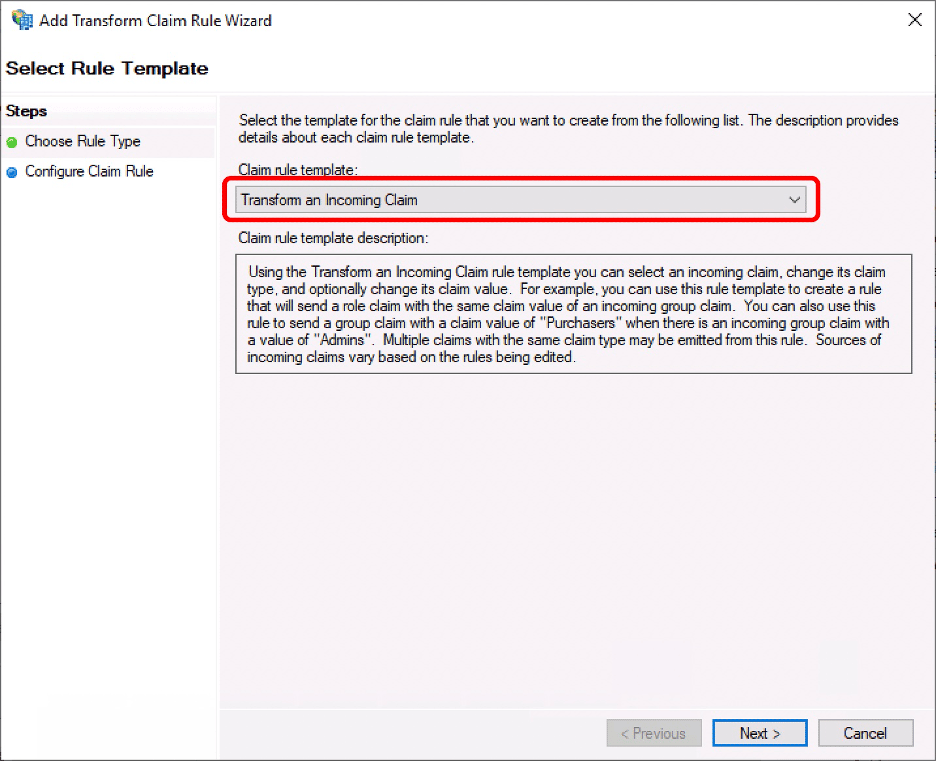
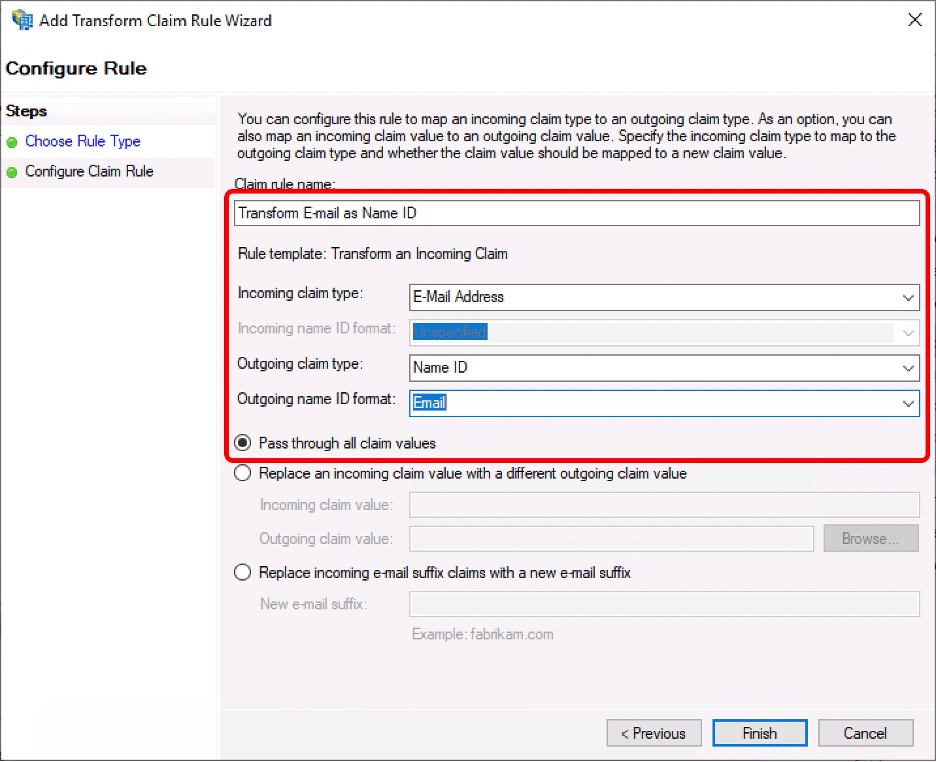
 5. Choose “Transform and Incoming Claim” and click “Next”.
 6. Fill out the following and click “Finish”.
Incoming claim type: E-Mail Address
Outgoing claim type: Name ID
Outgoing name ID format: Email
Choose “Pass through all claim values”
6. Fill out the following and click “Finish”.
Incoming claim type: E-Mail Address
Outgoing claim type: Name ID
Outgoing name ID format: Email
Choose “Pass through all claim values”
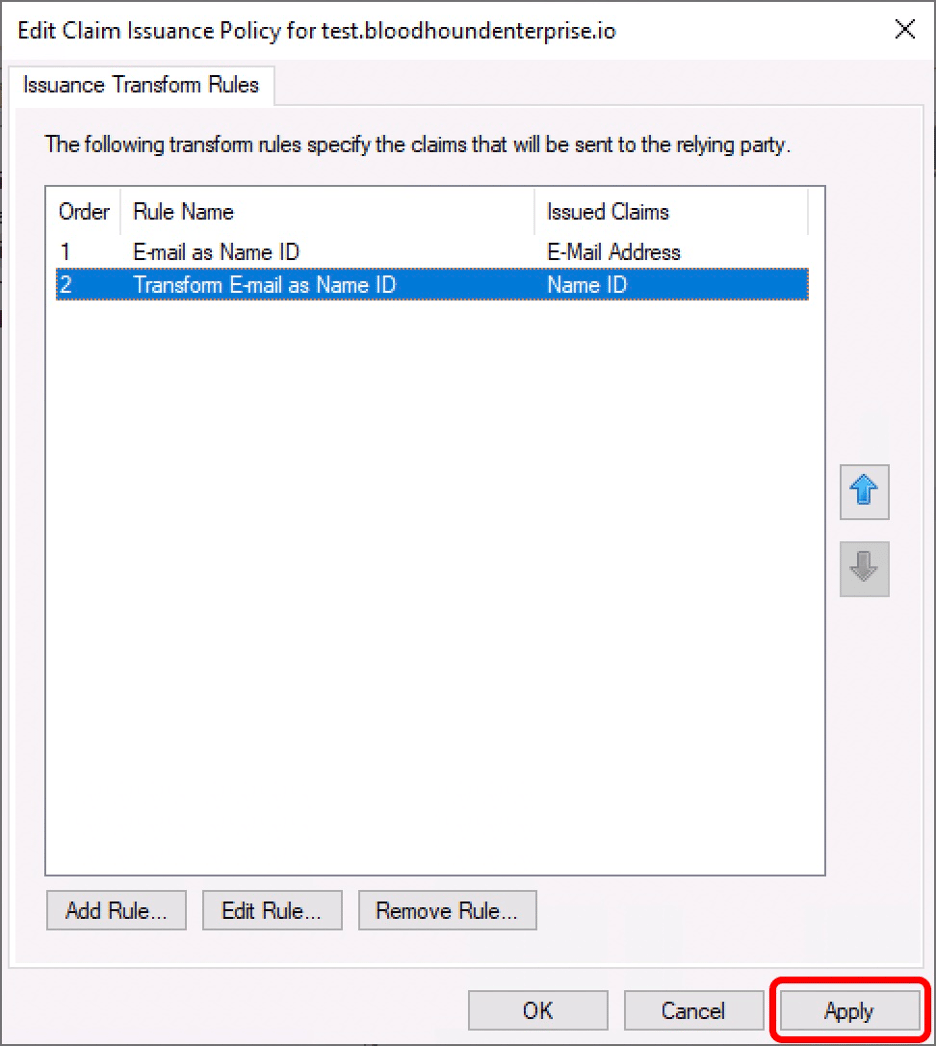
 7. Click “Apply”.
 8. Download the metadata file provided by your ADFS environment. By default, this is hosted at: [https://YOURDOMAIN/federationmetadata/2007-06/federationmetadata.xml](https://YOURDOMAIN/federationmetadata/2007-06/federationmetadata.xml)
9. Follow the instructions at [SAML in BloodHound Enterprise](/manage-bloodhound/auth/saml) to create the SAML provider in BloodHound Enterprise.
8. Download the metadata file provided by your ADFS environment. By default, this is hosted at: [https://YOURDOMAIN/federationmetadata/2007-06/federationmetadata.xml](https://YOURDOMAIN/federationmetadata/2007-06/federationmetadata.xml)
9. Follow the instructions at [SAML in BloodHound Enterprise](/manage-bloodhound/auth/saml) to create the SAML provider in BloodHound Enterprise.